http://www.codesonics.com
En este link se encuentra la version 1.5.0 disponible para bajar (trial de 30 dias).
Cada licencia cuesta U$S 15 (para mas de 50 licencias)
* Opens a web page to a specified URL when you receive a phone call to your Asterisk extension.
* Use all or part of the CallerID as a formfield in the URL
* Specify conditions under which the page is opened
* Uses the Asterisk Manager API
* Opens page on answer, ring or when asked
* Open page for any CallerID or if matched to a specific value, starts with, contains or ends with a specific value
* Allows you to strip characters from the start or end of CallerID
lunes, 18 de febrero de 2008


martes, 12 de febrero de 2008
AsteriskMonitor - Current: version 3 beta
http://www.asteriskmonitor.org/
AsteriskMonitor is a FREE powerful software completely written in Java and distributed under the GPL license. AsteriskMonitor pretends to be a bridge between Asterisk and any Java-based application trying to get statistics and data from the asterisk server.
AsteriskJavaEye is a FREE web-based java application, released under the GPL license too, that connects to AsteriskMonitor and shows you what's happening NOW in your Asterisk server: who is connected to which queues, for how long today, how many calls has he/she answered, is it ringing now, etc.
AsteriskJavaStat is a FREE web-based java module for AsteriskJavaEye, released under the GPL as well, that allows you to view formatted statistics from your PBX. AsteriskJavaStat won't read the CDR; it uses the AsteriskMonitor's statistic database, which is easier to read and mantain than the CDR.
Currently, the AsteriskMonitor, AsteriskJavaStat and AsteriskJavaEye name are owned by TICOP (www.ticop.com), an Asterisk-Developing Company from SPAIN, and the source-codes are released under the GPL license. The program can be used for free if you just keep a link to our website in the main visual screen of any software using our's.
In the SVN you will find the source code.
AsteriskMonitor is a FREE powerful software completely written in Java and distributed under the GPL license. AsteriskMonitor pretends to be a bridge between Asterisk and any Java-based application trying to get statistics and data from the asterisk server.
AsteriskJavaEye is a FREE web-based java application, released under the GPL license too, that connects to AsteriskMonitor and shows you what's happening NOW in your Asterisk server: who is connected to which queues, for how long today, how many calls has he/she answered, is it ringing now, etc.
AsteriskJavaStat is a FREE web-based java module for AsteriskJavaEye, released under the GPL as well, that allows you to view formatted statistics from your PBX. AsteriskJavaStat won't read the CDR; it uses the AsteriskMonitor's statistic database, which is easier to read and mantain than the CDR.
Features:
Automatic recognition of any kind of generic event (login/logout of agents, joining/leaving queues, new calls, voicemails, recordings, dials, transfers, etc)
- Real-time updated data-model of Asterisk's state on the server
- Server accesible trought RMI, with an open API that allows you just to deal with Terminals, Agents, Calls, Queues, etc, as Java objects.
- Expandable: You can easily develope new modules for AsteriskMonitor, to recognize new kinds of events for your own profit. You just need to write it in Java, compile your single .java file and leave it in the right directory. AsteriskMonitor will load it dinamycally and start using it in seconds. No compile or restart needed.
- Inverse mode: you can also modify Asterisk's state, adding agents to queues, reloading config files, restarting Asterisk, etc.
- Works over the Asterisk's Manager Api interface. It has got an integrated connection-repeater system, which will open as many new Manager Api ports as you want, allowing you to connect multiple programs to Asterisk trought AsteriskMonitor, Asterisk won't even notice about it.
- Includes a web application (AsteriskJavaEye) you can deploy on any Tomcat engine, which will connect to AsteriskMonitor trought RMI and allow you to see any statistical data you need about your agents, and will let you add/remove them from queues, connect/disconnect them, etc.
- All the system is 100% Java-Based and independent on the machine. You can have Asterisk working in a PC and run AsteriskMonitor + AsteriskJavaEye in any other one.
- Reliable CDR: AsteriskMonitor can register its own CDR, with detailed, exact and well-documented information about call times, steps, holds, transfers, etc. It can record agent connection times, total time spent in a queue, etc. AsteriskMonitor's statistical functions are able to connect to any database which has got a jdbc connector: MySQL, Postgre, Oracle, MS SQL, etc. No compilation or restart required; just put the driver in the right directory (if it hasn't got it already), and go to see your new statistics working.
- Statistics browser module: AsteriskJavaStat is an independent module that can be loaded into the AsteriskJavaEye, and will show you nice and real statistics about your contact center.
Version information:
AsteriskMonitor is currently in a beta version. It has been proved to be stable and reliable, and it's currently being used in a production system with 20 agents answering about 500 calls per day.About the author:
AsteriskMonitor has been enterely designed and developed by Roger de la Fuente (rdelafuente a_t ticop.com).Currently, the AsteriskMonitor, AsteriskJavaStat and AsteriskJavaEye name are owned by TICOP (www.ticop.com), an Asterisk-Developing Company from SPAIN, and the source-codes are released under the GPL license. The program can be used for free if you just keep a link to our website in the main visual screen of any software using our's.
Downloading AsteriskMonitor
by Roger de la Fuente on Monday 11 of February, 2008 [15:13:35]
The sourceforge project is:http://sourceforge.net/projects/asteriskmonitorIn the SVN you will find the source code.
miércoles, 16 de enero de 2008
Nuevas Tarjetas Digium
Digium acaba de anunciar sus nuevos modelos de tarjetas. Estos nuevos modelos vienen todos con soporte de cancelador de eco por hardware VPMADT032 que tan buen resultado están dando (siempre y cuando se configure corréctamente).
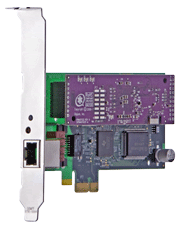
- La TE121P permite conectar 1 primario (E1/T1/J1) en un sistema que tenga slots PCI-Express (PCIe). Con esta, es la última tarjeta de primario que le faltaba a Digium para completar la familia de tarjetas PCI-Express. (Más información sobre la TE121P)
La TE122P es igual que la TE120P, de 1 primario (E1/T1/J1) con slot PCI (5v / 3.3V) con el añadido de traer soporte para el cancelador de eco por hardware VPMADT032. (Más información sobre la TE122P)
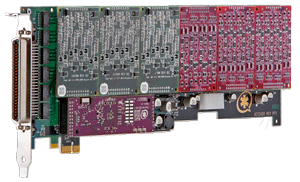
Por último, la AEX2400 es la nueva tarjeta analógica de hasta 24 puertos FXO/FXS con conector PCI-Express (PCIe) también con soporte de cancelador de eco por hardware VPMADT032. (Más información sobre la AEX2400)
Todas estas tarjetas ya vienen soportadas en el último paquete Zaptel 1.4.8 y 1.2.23
- La TE121P permite conectar 1 primario (E1/T1/J1) en un sistema que tenga slots PCI-Express (PCIe). Con esta, es la última tarjeta de primario que le faltaba a Digium para completar la familia de tarjetas PCI-Express. (Más información sobre la TE121P)
La TE122P es igual que la TE120P, de 1 primario (E1/T1/J1) con slot PCI (5v / 3.3V) con el añadido de traer soporte para el cancelador de eco por hardware VPMADT032. (Más información sobre la TE122P)
Por último, la AEX2400 es la nueva tarjeta analógica de hasta 24 puertos FXO/FXS con conector PCI-Express (PCIe) también con soporte de cancelador de eco por hardware VPMADT032. (Más información sobre la AEX2400)
Todas estas tarjetas ya vienen soportadas en el último paquete Zaptel 1.4.8 y 1.2.23
martes, 11 de diciembre de 2007
Activa brings the Asterisk IP PBX to the call center
Activa for Asterisk...
Activa brings the Asterisk IP PBX to the call center. Its components aim to enable call center implementations with functionality such as computer telephony, screenpop&click2dial, agent control, automatic dialing...
The Activa package includes an Asterisk TAPI Service Provider (TSP) we called Asterisk ActivaTSP. This TSP enables integration of TAPI third party applications and Asterisk. So for instance you could initiate outbound calls through Asterisk using your Microsoft Outlook, Microsoft Dialer, ACT!, TapiCall and many more. Call screen-popup is also supported. The TSP itself has been developed using the basic ASTProvider framework.
The package also includes a basic framework that enables integration of Asterisk with your C++ applications
Current version is 1.4.2 (Version readme)
We invite you to download the package, configure ActivaTSP and try it.
What is Activa TSP ?
Generally speaking a TAPI Service Provider (TSP) is a 'driver' that enables Microsoft TAPI to communicate to a telephony device such as a switch or modem.
So Activa Asterisk TSP enables TAPI and TAPI-compatible applications to use the Asterisk IP-PBX: Microsoft Outlook, ACT!, TapiCall, MS Dialer,...
jueves, 6 de diciembre de 2007
Installation of A2Billing on Trixbox
Fuente: http://trac.asterisk2billing.org/cgi-bin/trac.cgi/wiki/TrixboxInstall
This installation was tested on Trixbox version 2.2, Earlier versions of Trixbox need to have A2Billing removed.
The usual caveats apply, e.g. the author takes no responsibility for any damage done to an existing installation.
It also assumes that this is a default installation in respect of database passwords.
The guide should take you as far as making calls on A2Billing and provide a base for experimentation and learning, but for more advanced topics like callback, routing and billing DID, and other customisations, then there is documentation available, links to some of which are at the bottom of this page.
Scripted Trixbox Install
If you choose to use the installer script this will configure a FRESH install of trixbox with A2b v1.3 Beta
To use type the following after logging into trixbox:
cd ~/wget http://www.efirehost.com/a2b_trixbox_2.2_installer_FRESH.shsh a2b_trixbox_2.2_installer_FRESH.sh
After that script finishes you MUST continue by clicking HERE (don't scroll down)
Remove the remnants of the old A2Billing install on Trixbox 
In versions of Trixbox earlier than 2.2, a much older version of A2Billing was installed, and before proceding with the following steps, the remnants of the old A2Billing should be removed.
The directories and files to be removed are as follows: -
/var/www/html/a2billing/
/var/www/html/a2customer/
/var/lib/asterisk/agi-bin/a2billing.php
/var/lib/asterisk/agi-bin/libs_a2billing/
/etc/asterisk/additional_a2billing_iax.conf
/etc/asterisk/additional_a2billing_sip.conf
Log in to Trixbox, either via an SSH session or directly via a keyboard and monitor. rm /etc/asterisk/a2billing.conf
Drop the old database (if it exists) mysqladmin drop mya2billing -u root -ppassw0rd
Install PHP-PCNTL - a requirement of A2Billing ¶wget http://dfn.dl.sourceforge.net/sourceforge/phprpms/php-pcntl-4.3.11-2.5.1.i386.rpm
rpm -iv php-pcntl-4.3.11-2.5.1.i386.rpm
Get A2Billing 
Now get the latest version of A2Billing. At the time of writing this was 1.3 Beta 1
http://a2billing.net/download.php?get=a2billing-v1-3-Beta.tar.gz
Copy the file into /root/ then Untar it: -
NB. A useful application for moving, copying and editing files on linux machine and moving files from Windows to Linux is WinSCP http://winscp.net/ tar zxfv a2billing-v1-3-Beta.tar.gz
Install the A2Billing Database ¶cd 1.3.0-Beta/DataBase/mysql/Mysql-3.x_4.x/
echo "GRANT ALL PRIVILEGES ON *.* TO 'a2billinguser'@'localhost' IDENTIFIED BY 'a2billing' WITH GRANT OPTION;" mysql -ppassw0rd
mysqladmin create mya2billing -u a2billinguser -pa2billing
mysql mya2billing -u a2billinguser -pa2billing < class="anchor" title="Link to this section" href="http://trac.asterisk2billing.org/cgi-bin/trac.cgi/wiki/TrixboxInstall#InstalltheUserInterface"> cd ..
cd ..
cd ..
mv ./A2Billing_UI /var/www/html/A2Billing_UI
mv ./A2BCustomer_UI/ /var/www/html/A2BCustomer_UI
Install the default a2billing configuration file ¶mv a2billing.conf /etc/asterisk/a2billing.conf
Install the AGI ¶cd A2Billing_AGI
mv a2billing.php /var/lib/asterisk/agi-bin/a2billing.php
mv libs_a2billing /var/lib/asterisk/agi-bin
Install the extra sounds required. ¶cd ..
cd /addons/sounds/
mv * /var/lib/asterisk/sounds/
Setup the IAX and SIP conf files ¶cd /etc/asterisk/
touch additional_a2billing_iax.conf
touch additional_a2billing_sip.conf
touch extensions_a2billing.conf
Set permissions and ownersip ¶chmod 666 /etc/asterisk/additional_a2billing_iax.conf
chmod 666 /etc/asterisk/additional_a2billing_sip.conf
chmod 666 /etc/asterisk/extensions_a2billing.conf
chown -R asterisk:asterisk /etc/asterisk/
chown -R asterisk:asterisk /var/www/html/
chown -R asterisk:asterisk /var/lib/asterisk/
The next job is edit the conf files to fit the Trixbox installation
Edit Conf Files to Suit A2Billing 
This assumes the default Trixbox installation
Edit A2Billing.conf 
The file a2billing.conf, located in /etc/asterisk/ is where all the defaults are set for the A2Billing system. It is recommended that most of the defaults are left as are, unless you are trying to achieve something specific. Changes to the file, when saved have an instant effect on the behaviour of A2Billing.
This file can be editted using your favourite editor, such as vi, via winSCP or via Config Edit included with Trixbox.
The Database section
comment out dbtype = postgres
remove the ; from ;dbtype = mysql
should look like this : - [database]
hostname = localhost
port = 5432
user = a2billinguser
password = a2billing
dbname = mya2billing
;dbtype = postgres
dbtype = mysql
Manager Connection Parameters
In the webui section, identify the Manager connection parameters. This allows A2Billing to communicate with Asterisk.
The values here should be set to the same as those in manager.conf, and its associated files. In the case of Trixbox, we have an entry for a2billinguser in manager_custom.conf. The existing parameters are: -
username = a2billinguser
Secret = a2billing
So we need to edit a2billing.conf manager connection credentials to match those in manager_custom.conf so that it looks like this: - ; MANAGER CONNECTION PARAMETERS
manager_host = localhost
manager_username = a2billinguser
manager_secret = a2billing
Now save a2billing.conf
There are plenty of other options that can be changed within a2billing.conf, and they are reasonably well documented and commented in the file.
Includes
During the install process, three new files were created: -
additional_a2billing_sip.conf - SIP friends
additional_a2billing_iax.conf - IAX Friends
extensions_a2billing.conf - A2Billing contexts
We need to ensure that the values in these files are picked up by Asterisk.
Edit /etc/asterisk/sip.conf and include additional_a2billing_sip.conf so that the last few lines of sip.conf look like this: - ; #, in this configuration file, is NOT A COMMENT. This is exactly
; how it should be.
#include sip_nat.conf
#include sip_custom.conf
#include sip_additional.conf
#include additional_a2billing_sip.conf
Then do the same for iax.conf so that it looks like this #include iax_registrations_custom.conf
#include iax_registrations.conf
#include iax_custom.conf
#include iax_additional.conf
#include additional_a2billing_iax.conf
NB - If using FreePBX 2.3, then do not edit sip and and iax.conf, but create two new files: -
sip_custom.conf, which should contain #include additional_a2billing_sip.conf
and
iax_custom.conf which contains #include additional_a2billing_iax.conf
you must then set the ownership:- chown asterisk:asterisk /etc/asterisk/iax_custom.conf
chown asterisk:asterisk /etc/asterisk/sip_custom.conf
Finally, we need to include extensions_a2billing.conf in extensions_custom.conf
Edit extensions_custom.conf and add #include extensions_a2billing.conf under the other includes, so that it looks like this: - #include extensions_trixbox.conf
#include extensions_hud.conf
#include extensions_a2billing.conf
A2Billing Contexts
In extensions_a2billing.conf, add the following lines: - [a2billing]
exten => _X.,1,Answer
exten => _X.,n,Wait(1)
exten => _X.,n,DeadAGI(a2billing.php1)
exten => _X.,n,Hangup
NB. Note the 1 after a2billing.php - The 1 refers to which agi-conf to use in a2billing.conf if you want a2billing to react in a different way to the default, copy everything from agi-conf1 to the end of the file, and paste at the end of the file, then rename your new agi-conf to agi-conf2. Your new defaults can then be called with (a2billing.php2)
Save this file, and issue a reload on Asterisk to apply the new asterisk config files.
You now have a basic A2Billing platform set up, so we need to create some defaults in A2Billing GUI.
Setting up A2Billing_UI
Before we can start adding accounts to the system,we need to set up some basic defaults within the Graphical User Interface.
This set of instructions is only providing a basic working system with no frills.
If the instructions above have gone well, you should be able to log into A2Billing Adminstration portal which is to be found at http:///A2Billing_UI/
You will be presented with a username and password enter: -
username = root
password - myroot
Other passwords that are setup by default are admin and mypassword. Clearly, it is a good idea to change these.
Click Administrator on the sidebar, show administrator -> edit
Trunks
In order to make outbound calls, it is necessary to create a trunk.
It is assumed that you already have a working trunk in the Trixbox / FreePBX, and this trunk can be used in A2Billing.
Identify the name of the trunk in FreePBX - in this instance, we'll assume its called MYIAXTEL
On the Sidebar, Trunks -> Add Trunk
Give the trunk a useful name - for example in this case, MYIAXTEL_Trunk
Enter the type of trunk you are using in FreePBX (SIP / IAX2 / ZAP)and enter the type of trunk in "Provider Tech" In this case, we'll assume it's an IAX trunk, so enter IAX2.
In the Provider IP section, simply type the name of the trunk you have already set up in FreePBX. In this example MYIAXTEL
Click "confirm data" in the bottom right hand corner of the screen
Create Some Rates
There are a number of steps to creating the rates. The relationships are as follows.
One customer / Card has one call plan
A Call Plan can have many Rate Cards
A Rate Card can have Many Rates.
Create a Call Plan
On the sidebar, click Ratecard -> Create call plan
Give the call plan a name, e.g. StandardCallPlan
You have two options, LCR and LCD - LCR will route the call at the cheapest rate for you, and LCD will route the call at the cheapest rate for the customer.
Leave Package set to "No Package Offer" as we have not created one yet.
Remove Inter Prefix should be set to yes if your VoIP provider demands that the numbers be dialled in IETF format. Leave it to NO if you just want the calls dialled as is.
We will assume in this case that you have a VoIP provider that demands IETF format e.g. to dial the UK you would dial 44 xxx xxx xxx rather than 0044... or 01144... so set the Remove Inter Prefix to YES and click confirm data.
Create New Ratecard
We now have to create a new ratecard. For demonstration purposes, we'll call it StandardRates
Click "Create new Ratecard" on the sidebar.
In TariffName enter StandardRates
Select MYIAXTEL_trunk in the trunk field and confirm data.
Add Rate Card to Call Plan
Go back and click "List Call Plan" and if everything is still going well, you should see StandardCallPlan listed. Click Edit at the end of the line, and at the boittom of the page, in the dropdown, select the previously created StandardRates Click Add, and confirm data.
As you get rates from different providers, they can be added into the call plan and selected on the basis of price.
Add Some Rates
We now have to add some rates. Rates can be imported in bulk from a CSV file, or typed in one at a time. If a rate for a destination does not exist, then A2Billing cannot deliver the call.
Each dialling code for each destination needs to be added. It is important to be accurate with the dialling codes. For instance, if there is a destination, say a premium rated dialling code in East Africa that you are under charging, someone can make a lot of money at your expense.
Unfortunately, there is not a definitive dialling code list with sufficient granularity that I can find on the internet. However, your carrier should be able to supply you with a list of dialling codes and the charges they make.
A country list with dialling codes is included with A2Billing under Misc -> Browse Prefix. This list however, does not take into account destinations such as Mobile and Premium Rated Numbers.
So for the moment, we are testing via VoIP, our VoIP provider demands that we send them the digits in IETF format, and we want to make a out first call over A2Billing to a UK national number. UK National numbers only begin with either 441 or 442
So we will add the first rate. Assume billing to the nearest second, the cost is 1 US cent per minute and we are selling at 2 cents per minute. We are assuming everything is in US Dollars for the moment because we have not changed the default currency.
NB. To change the default currency, Edit a2billing.conf base_currency =Each currency has a unique 3 letter identifier. To find the identifier, click Billing -> Currency List on the sidebar, then hunt for your country. When a2billing.conf is saved, you can update the exchange rates in the currencies screen.
Click Ratecard -> Add Rate
Select the ratecard you are adding the rate to in the ratecard dropdown
Enter the dial prefix as 441-442. This will allow any calls dialled as 441... and 442...
Enter a name for the destination - UK National
Set the buying rate - in this case 0.01
Set the minimum duration - assume 1 as in 1 second
Set the Buyrate Billing Block, assume 1 again. If you are chaged to the nearest minute, then put 60.
Put in the selling rate - 0.02
The Sellrate min duration - 1
The sellrate Billing Block - 1 for per second billing.
The connect charge and disconnect charge can be left blank for the moment
Leave the Trunk to not defined, as we defined it earlier for the ratecard as a whole.
and finally confirm data.
The system is now ready to create a customer, and make the first call.
Creating the First Customer
The customer can be created one at a time from the Admin interface, created in bulk from the admin screens, or created from the customer signup page at http://>/A2Billing_UI/Signup
In order to create a customer from the signup page, outbound email has to be working (type setup-mail from the command line)
In this example - we will create a new customer from the admin interface.
Click Customers -> Create Customers
Add a balance, say 10
Select the StandardCallPlan we created earlier
Activated = yes
Signup Confirmation = yes
Enter your Name and email address in the appropriate fields
and confirm data.
Create a SIP Account
Assume we are using a SIP phone for demonstration purposes. The same principles apply to an IAX phone as well.
Under List customers, click the SIP button
Click "Generate Additional_A2Billing.conf
Click to reload the asterisk server.
Click Customers -> List SIP Friend, and there should be a new entry in there.
Click edit at the end of the line.
Your SIP phone needs to be configured with the following parameters: -
Hostname is the IP Address of your Trixbox
Your Extension / Username will be the numbers in the "Username" Field
Your Secret will be the numbers in the "Secret" Field
And ensure that the DTMF mode is the same on your phone as it is in the DTMFMODE field.
Your phone should now be registered to the Asterisk Server. You can check this by looking at the Asterisk Info screen in Trixbox.
Make the call
There is one small change to made to a2billing.conf in this application - set "use_dnid = yes" in a2billing.conf and save the file.
Dial the number you want to try - in our example, you can only dial numbers begining with 441 and 442, or 00441 or 00442. The call plan settings will strip the international prefix numbers off the call, if they exist.
Press send, and you will hear your current balance, the number of minutes you can dial that destination, and then if everything has gone well, you should then be connected to the distant end.
Make A2Billing accessable from the outside world 
In order to call into A2Billing from the outside world, we will need a DID pointed at trixbox, or indeed a normal telephone line.
We capture the call in Inbound Routes in Trixbox / FreePBX and send it into A2Billing.
Because FreePBX only allows you to send calls to a custom context that is prefixed with "Custom-" in we need to add a custom context in extensions-a2billing.conf
So in config edit, vi or your favourite text editor, add the following lines to extensions-a2billing.conf so that the entire file looks like this: - [a2billing]
exten => _X.,1,Answer
exten => _X.,n,Wait(1)
exten => _X.,n,DeadAGI(a2billing.php1)
exten => _X.,n,Hangup
[custom-a2billing]
exten => _X.,1,Answer
exten => _X.,n,Wait(1)
exten => _X.,n,DeadAGI(a2billing.php1)
exten => _X.,n,Hangup
Then go to Inbound Routes in FreePBX / Trixbox and add a new inbound route
Enter your DID in the DID number.
Select the Custom App: radio button and in the Custom App field enter the following string: -
custom-a2billing,${EXTEN},1
then submit and apply configuration changes.
You should be able to dial the number, and you will hear, "Please enter your account number" Type in your card number. That is the first field in A2Billing -> Customers -> List Customers -> Edit
Your balance will then be read out to you, then you can dial the number, the maximum duration will be read out to you, then you should be connected to the number you dialled.
NB. You may have to change "use_dnid = no" when dialling in using this system, or you can add another agi_conf (agi_conf2) to the bottom of a2billing.conf and call it from Inbound Routes by using the following string: -
custom-a2billing,${EXTEN},2
Conclusion
This guide should have put you into a position to make calls out of A2Billing, and get a basic configuration going.
But it is only the tip of the iceberg as to what the system can do.
For further reading there are a number of sources: -
The logic of how it works can be found at User Guide
A description of all the pages is at User Manual
More information about configuring the call back elements and other features such as customising the look and feel of A2Billing, not described in this document, can be found in the installation files under Addons/Docs
Further information and help can be found in the A2Billing forum at http://forum.asterisk2billing.org/
Commercial Support, sales and special projects are available from the A2Billing Team. Email support@asterisk2billing.org and sales@asterisk2billing.org
As ever, to help this project develop, then please report any bugs or any ommisions / errata in the documentation.
And finally, if you found this documentation and the A2Billing product useful, we'd really appreciate it if you showed your appreciation with a small donation to help support costs of broadband etc.
Attachments
a2b_trixbox_2.2_installer_FRESH.sh (5.1 kB) - added by crshman on 06/04/07 08:37:28.
addHeadingLinks(document.getElementById("searchable"), "Link to this section");
searchHighlight()
Download in other formats:
Plain Text
This installation was tested on Trixbox version 2.2, Earlier versions of Trixbox need to have A2Billing removed.
The usual caveats apply, e.g. the author takes no responsibility for any damage done to an existing installation.
It also assumes that this is a default installation in respect of database passwords.
The guide should take you as far as making calls on A2Billing and provide a base for experimentation and learning, but for more advanced topics like callback, routing and billing DID, and other customisations, then there is documentation available, links to some of which are at the bottom of this page.
Scripted Trixbox Install
If you choose to use the installer script this will configure a FRESH install of trixbox with A2b v1.3 Beta
To use type the following after logging into trixbox:
cd ~/wget http://www.efirehost.com/a2b_trixbox_2.2_installer_FRESH.shsh a2b_trixbox_2.2_installer_FRESH.sh
After that script finishes you MUST continue by clicking HERE (don't scroll down)
Remove the remnants of the old A2Billing install on Trixbox 
In versions of Trixbox earlier than 2.2, a much older version of A2Billing was installed, and before proceding with the following steps, the remnants of the old A2Billing should be removed.
The directories and files to be removed are as follows: -
/var/www/html/a2billing/
/var/www/html/a2customer/
/var/lib/asterisk/agi-bin/a2billing.php
/var/lib/asterisk/agi-bin/libs_a2billing/
/etc/asterisk/additional_a2billing_iax.conf
/etc/asterisk/additional_a2billing_sip.conf
Log in to Trixbox, either via an SSH session or directly via a keyboard and monitor. rm /etc/asterisk/a2billing.conf
Drop the old database (if it exists) mysqladmin drop mya2billing -u root -ppassw0rd
Install PHP-PCNTL - a requirement of A2Billing ¶wget http://dfn.dl.sourceforge.net/sourceforge/phprpms/php-pcntl-4.3.11-2.5.1.i386.rpm
rpm -iv php-pcntl-4.3.11-2.5.1.i386.rpm
Get A2Billing 
Now get the latest version of A2Billing. At the time of writing this was 1.3 Beta 1
http://a2billing.net/download.php?get=a2billing-v1-3-Beta.tar.gz
Copy the file into /root/ then Untar it: -
NB. A useful application for moving, copying and editing files on linux machine and moving files from Windows to Linux is WinSCP http://winscp.net/ tar zxfv a2billing-v1-3-Beta.tar.gz
Install the A2Billing Database ¶cd 1.3.0-Beta/DataBase/mysql/Mysql-3.x_4.x/
echo "GRANT ALL PRIVILEGES ON *.* TO 'a2billinguser'@'localhost' IDENTIFIED BY 'a2billing' WITH GRANT OPTION;" mysql -ppassw0rd
mysqladmin create mya2billing -u a2billinguser -pa2billing
mysql mya2billing -u a2billinguser -pa2billing < class="anchor" title="Link to this section" href="http://trac.asterisk2billing.org/cgi-bin/trac.cgi/wiki/TrixboxInstall#InstalltheUserInterface"> cd ..
cd ..
cd ..
mv ./A2Billing_UI /var/www/html/A2Billing_UI
mv ./A2BCustomer_UI/ /var/www/html/A2BCustomer_UI
Install the default a2billing configuration file ¶mv a2billing.conf /etc/asterisk/a2billing.conf
Install the AGI ¶cd A2Billing_AGI
mv a2billing.php /var/lib/asterisk/agi-bin/a2billing.php
mv libs_a2billing /var/lib/asterisk/agi-bin
Install the extra sounds required. ¶cd ..
cd /addons/sounds/
mv * /var/lib/asterisk/sounds/
Setup the IAX and SIP conf files ¶cd /etc/asterisk/
touch additional_a2billing_iax.conf
touch additional_a2billing_sip.conf
touch extensions_a2billing.conf
Set permissions and ownersip ¶chmod 666 /etc/asterisk/additional_a2billing_iax.conf
chmod 666 /etc/asterisk/additional_a2billing_sip.conf
chmod 666 /etc/asterisk/extensions_a2billing.conf
chown -R asterisk:asterisk /etc/asterisk/
chown -R asterisk:asterisk /var/www/html/
chown -R asterisk:asterisk /var/lib/asterisk/
The next job is edit the conf files to fit the Trixbox installation
Edit Conf Files to Suit A2Billing 
This assumes the default Trixbox installation
Edit A2Billing.conf 
The file a2billing.conf, located in /etc/asterisk/ is where all the defaults are set for the A2Billing system. It is recommended that most of the defaults are left as are, unless you are trying to achieve something specific. Changes to the file, when saved have an instant effect on the behaviour of A2Billing.
This file can be editted using your favourite editor, such as vi, via winSCP or via Config Edit included with Trixbox.
The Database section
comment out dbtype = postgres
remove the ; from ;dbtype = mysql
should look like this : - [database]
hostname = localhost
port = 5432
user = a2billinguser
password = a2billing
dbname = mya2billing
;dbtype = postgres
dbtype = mysql
Manager Connection Parameters
In the webui section, identify the Manager connection parameters. This allows A2Billing to communicate with Asterisk.
The values here should be set to the same as those in manager.conf, and its associated files. In the case of Trixbox, we have an entry for a2billinguser in manager_custom.conf. The existing parameters are: -
username = a2billinguser
Secret = a2billing
So we need to edit a2billing.conf manager connection credentials to match those in manager_custom.conf so that it looks like this: - ; MANAGER CONNECTION PARAMETERS
manager_host = localhost
manager_username = a2billinguser
manager_secret = a2billing
Now save a2billing.conf
There are plenty of other options that can be changed within a2billing.conf, and they are reasonably well documented and commented in the file.
Includes
During the install process, three new files were created: -
additional_a2billing_sip.conf - SIP friends
additional_a2billing_iax.conf - IAX Friends
extensions_a2billing.conf - A2Billing contexts
We need to ensure that the values in these files are picked up by Asterisk.
Edit /etc/asterisk/sip.conf and include additional_a2billing_sip.conf so that the last few lines of sip.conf look like this: - ; #, in this configuration file, is NOT A COMMENT. This is exactly
; how it should be.
#include sip_nat.conf
#include sip_custom.conf
#include sip_additional.conf
#include additional_a2billing_sip.conf
Then do the same for iax.conf so that it looks like this #include iax_registrations_custom.conf
#include iax_registrations.conf
#include iax_custom.conf
#include iax_additional.conf
#include additional_a2billing_iax.conf
NB - If using FreePBX 2.3, then do not edit sip and and iax.conf, but create two new files: -
sip_custom.conf, which should contain #include additional_a2billing_sip.conf
and
iax_custom.conf which contains #include additional_a2billing_iax.conf
you must then set the ownership:- chown asterisk:asterisk /etc/asterisk/iax_custom.conf
chown asterisk:asterisk /etc/asterisk/sip_custom.conf
Finally, we need to include extensions_a2billing.conf in extensions_custom.conf
Edit extensions_custom.conf and add #include extensions_a2billing.conf under the other includes, so that it looks like this: - #include extensions_trixbox.conf
#include extensions_hud.conf
#include extensions_a2billing.conf
A2Billing Contexts
In extensions_a2billing.conf, add the following lines: - [a2billing]
exten => _X.,1,Answer
exten => _X.,n,Wait(1)
exten => _X.,n,DeadAGI(a2billing.php1)
exten => _X.,n,Hangup
NB. Note the 1 after a2billing.php - The 1 refers to which agi-conf to use in a2billing.conf if you want a2billing to react in a different way to the default, copy everything from agi-conf1 to the end of the file, and paste at the end of the file, then rename your new agi-conf to agi-conf2. Your new defaults can then be called with (a2billing.php2)
Save this file, and issue a reload on Asterisk to apply the new asterisk config files.
You now have a basic A2Billing platform set up, so we need to create some defaults in A2Billing GUI.
Setting up A2Billing_UI
Before we can start adding accounts to the system,we need to set up some basic defaults within the Graphical User Interface.
This set of instructions is only providing a basic working system with no frills.
If the instructions above have gone well, you should be able to log into A2Billing Adminstration portal which is to be found at http://
You will be presented with a username and password enter: -
username = root
password - myroot
Other passwords that are setup by default are admin and mypassword. Clearly, it is a good idea to change these.
Click Administrator on the sidebar, show administrator -> edit
Trunks
In order to make outbound calls, it is necessary to create a trunk.
It is assumed that you already have a working trunk in the Trixbox / FreePBX, and this trunk can be used in A2Billing.
Identify the name of the trunk in FreePBX - in this instance, we'll assume its called MYIAXTEL
On the Sidebar, Trunks -> Add Trunk
Give the trunk a useful name - for example in this case, MYIAXTEL_Trunk
Enter the type of trunk you are using in FreePBX (SIP / IAX2 / ZAP)and enter the type of trunk in "Provider Tech" In this case, we'll assume it's an IAX trunk, so enter IAX2.
In the Provider IP section, simply type the name of the trunk you have already set up in FreePBX. In this example MYIAXTEL
Click "confirm data" in the bottom right hand corner of the screen
Create Some Rates
There are a number of steps to creating the rates. The relationships are as follows.
One customer / Card has one call plan
A Call Plan can have many Rate Cards
A Rate Card can have Many Rates.
Create a Call Plan
On the sidebar, click Ratecard -> Create call plan
Give the call plan a name, e.g. StandardCallPlan
You have two options, LCR and LCD - LCR will route the call at the cheapest rate for you, and LCD will route the call at the cheapest rate for the customer.
Leave Package set to "No Package Offer" as we have not created one yet.
Remove Inter Prefix should be set to yes if your VoIP provider demands that the numbers be dialled in IETF format. Leave it to NO if you just want the calls dialled as is.
We will assume in this case that you have a VoIP provider that demands IETF format e.g. to dial the UK you would dial 44 xxx xxx xxx rather than 0044... or 01144... so set the Remove Inter Prefix to YES and click confirm data.
Create New Ratecard
We now have to create a new ratecard. For demonstration purposes, we'll call it StandardRates
Click "Create new Ratecard" on the sidebar.
In TariffName enter StandardRates
Select MYIAXTEL_trunk in the trunk field and confirm data.
Add Rate Card to Call Plan
Go back and click "List Call Plan" and if everything is still going well, you should see StandardCallPlan listed. Click Edit at the end of the line, and at the boittom of the page, in the dropdown, select the previously created StandardRates Click Add, and confirm data.
As you get rates from different providers, they can be added into the call plan and selected on the basis of price.
Add Some Rates
We now have to add some rates. Rates can be imported in bulk from a CSV file, or typed in one at a time. If a rate for a destination does not exist, then A2Billing cannot deliver the call.
Each dialling code for each destination needs to be added. It is important to be accurate with the dialling codes. For instance, if there is a destination, say a premium rated dialling code in East Africa that you are under charging, someone can make a lot of money at your expense.
Unfortunately, there is not a definitive dialling code list with sufficient granularity that I can find on the internet. However, your carrier should be able to supply you with a list of dialling codes and the charges they make.
A country list with dialling codes is included with A2Billing under Misc -> Browse Prefix. This list however, does not take into account destinations such as Mobile and Premium Rated Numbers.
So for the moment, we are testing via VoIP, our VoIP provider demands that we send them the digits in IETF format, and we want to make a out first call over A2Billing to a UK national number. UK National numbers only begin with either 441 or 442
So we will add the first rate. Assume billing to the nearest second, the cost is 1 US cent per minute and we are selling at 2 cents per minute. We are assuming everything is in US Dollars for the moment because we have not changed the default currency.
NB. To change the default currency, Edit a2billing.conf base_currency =
Click Ratecard -> Add Rate
Select the ratecard you are adding the rate to in the ratecard dropdown
Enter the dial prefix as 441-442. This will allow any calls dialled as 441... and 442...
Enter a name for the destination - UK National
Set the buying rate - in this case 0.01
Set the minimum duration - assume 1 as in 1 second
Set the Buyrate Billing Block, assume 1 again. If you are chaged to the nearest minute, then put 60.
Put in the selling rate - 0.02
The Sellrate min duration - 1
The sellrate Billing Block - 1 for per second billing.
The connect charge and disconnect charge can be left blank for the moment
Leave the Trunk to not defined, as we defined it earlier for the ratecard as a whole.
and finally confirm data.
The system is now ready to create a customer, and make the first call.
Creating the First Customer
The customer can be created one at a time from the Admin interface, created in bulk from the admin screens, or created from the customer signup page at http://
In order to create a customer from the signup page, outbound email has to be working (type setup-mail from the command line)
In this example - we will create a new customer from the admin interface.
Click Customers -> Create Customers
Add a balance, say 10
Select the StandardCallPlan we created earlier
Activated = yes
Signup Confirmation = yes
Enter your Name and email address in the appropriate fields
and confirm data.
Create a SIP Account
Assume we are using a SIP phone for demonstration purposes. The same principles apply to an IAX phone as well.
Under List customers, click the SIP button
Click "Generate Additional_A2Billing.conf
Click to reload the asterisk server.
Click Customers -> List SIP Friend, and there should be a new entry in there.
Click edit at the end of the line.
Your SIP phone needs to be configured with the following parameters: -
Hostname is the IP Address of your Trixbox
Your Extension / Username will be the numbers in the "Username" Field
Your Secret will be the numbers in the "Secret" Field
And ensure that the DTMF mode is the same on your phone as it is in the DTMFMODE field.
Your phone should now be registered to the Asterisk Server. You can check this by looking at the Asterisk Info screen in Trixbox.
Make the call
There is one small change to made to a2billing.conf in this application - set "use_dnid = yes" in a2billing.conf and save the file.
Dial the number you want to try - in our example, you can only dial numbers begining with 441 and 442, or 00441 or 00442. The call plan settings will strip the international prefix numbers off the call, if they exist.
Press send, and you will hear your current balance, the number of minutes you can dial that destination, and then if everything has gone well, you should then be connected to the distant end.
Make A2Billing accessable from the outside world 
In order to call into A2Billing from the outside world, we will need a DID pointed at trixbox, or indeed a normal telephone line.
We capture the call in Inbound Routes in Trixbox / FreePBX and send it into A2Billing.
Because FreePBX only allows you to send calls to a custom context that is prefixed with "Custom-" in we need to add a custom context in extensions-a2billing.conf
So in config edit, vi or your favourite text editor, add the following lines to extensions-a2billing.conf so that the entire file looks like this: - [a2billing]
exten => _X.,1,Answer
exten => _X.,n,Wait(1)
exten => _X.,n,DeadAGI(a2billing.php1)
exten => _X.,n,Hangup
[custom-a2billing]
exten => _X.,1,Answer
exten => _X.,n,Wait(1)
exten => _X.,n,DeadAGI(a2billing.php1)
exten => _X.,n,Hangup
Then go to Inbound Routes in FreePBX / Trixbox and add a new inbound route
Enter your DID in the DID number.
Select the Custom App: radio button and in the Custom App field enter the following string: -
custom-a2billing,${EXTEN},1
then submit and apply configuration changes.
You should be able to dial the number, and you will hear, "Please enter your account number" Type in your card number. That is the first field in A2Billing -> Customers -> List Customers -> Edit
Your balance will then be read out to you, then you can dial the number, the maximum duration will be read out to you, then you should be connected to the number you dialled.
NB. You may have to change "use_dnid = no" when dialling in using this system, or you can add another agi_conf (agi_conf2) to the bottom of a2billing.conf and call it from Inbound Routes by using the following string: -
custom-a2billing,${EXTEN},2
Conclusion
This guide should have put you into a position to make calls out of A2Billing, and get a basic configuration going.
But it is only the tip of the iceberg as to what the system can do.
For further reading there are a number of sources: -
The logic of how it works can be found at User Guide
A description of all the pages is at User Manual
More information about configuring the call back elements and other features such as customising the look and feel of A2Billing, not described in this document, can be found in the installation files under Addons/Docs
Further information and help can be found in the A2Billing forum at http://forum.asterisk2billing.org/
Commercial Support, sales and special projects are available from the A2Billing Team. Email support@asterisk2billing.org and sales@asterisk2billing.org
As ever, to help this project develop, then please report any bugs or any ommisions / errata in the documentation.
And finally, if you found this documentation and the A2Billing product useful, we'd really appreciate it if you showed your appreciation with a small donation to help support costs of broadband etc.
Attachments
a2b_trixbox_2.2_installer_FRESH.sh (5.1 kB) - added by crshman on 06/04/07 08:37:28.
addHeadingLinks(document.getElementById("searchable"), "Link to this section");
searchHighlight()
Download in other formats:
Plain Text
miércoles, 28 de noviembre de 2007
Firewall, NAT y SIP
Sip ,trunking, nat y los firewall...los cuales no son faciles.. (http://www.ingate.com/)
Ingate SIParators
http://www.ingate.com/SIP-trunking.php
he most common solution for enterprises with a local IP-PBX to connect to the PSTN is via a local PSTN gateway. However, today more and more service providers offer one single connection for both data and voice between the carrier and the enterprise. This is commonly called a SIP trunk. For the enterprise this means that they no longer need either the local PSTN gateway or costly PRI/BRI?s as the local IP-PBX can be connected to the service provider?s PSTN gateways over the Internet.
The SIP Trunking software module, working in conjunction with an Ingate Firewall or SIParator, solves the Network Address Translation (NAT) traversal issues that are faced by businesses using a SIP trunk. Together, they control both incoming and outgoing communications and route the communication to the intended users. All voice traffic (as well as data traffic) must traverse the enterprise firewall/NAT. However, SIP traffic cannot traverse traditional enterprise firewalls and NAT devices. As a result, the firewall/NAT device blocks all SIP traffic, which includes VoIP. Ingate resolves this issue, enabling enterprises to utilize SIP trunks and enjoy the benefits of SIP trunking while maintaining the security and integrity of their network.
A cost-efficient solution, the SIP trunk reduces monthly expenses for the enterprise as they:
* Only need one connection for both data and voice
* No longer need PRI/BRI connections
* Don?t have to buy or maintain a local PSTN-gateway
Firewalls and Benefits of Proxy-Based Solutions -- Technical details
The Ingate Firewall® or Ingate SIParator® solves the basic problem of firewall and NAT traversal using a SIP proxy-based implementation. The SIP proxy is a complete solution to the firewall and NAT traversal issues introduced by the enterprise firewall. A proxy is designed to briefly stop the signaling packets so that each one can be inspected before the header information is rewritten. The SIP proxy also makes sure the packets are delivered to the appropriate endpoints. This provides the enterprise with a flexible, controlled implementation of SIP-based communications that also maintains voice/video quality. Ingate Firewalls and SIParators offer a number of advantages:
* Near-end NAT traversal for connecting SIP communications between an enterprise and a carrier
* Dynamically open and close the media ports to admit voice or video on both UDP and TCP ports
* Encryption for communication privacy and prevention of eavesdropping. Include termination, transcoding and passthrough of TLS and SRTP
* Authentication and registration at the carrier side
* Give priority of voice traffic using the Ingate Quality of Service features
* ENUM look-up to route the call IP-IP all the way if possible
* Least cost routing of international calls
Confirmed interoperability
Ingate has confirmed interoperability several of the leading IP-PBX vendors and ITSPs. See the full list here.
Startup Tool for SIP Trunking
The Startup Tool is an installation tool for Ingate Firewall® and Ingate SIParator® products using the Ingate SIP Trunking software module, which facilitates the setup of complete SIP trunking solutions. The tool will automatically configure a user?s Ingate Firewall or SIParator to work with the IP-PBX or SIP trunking service provider of their choice. With the push of a button, the configuration tool will automatically create a SIP trunk connection designed to the user?s individual setup.
Read more about the tool here.
Read more about the Ingate SIP Trunking software module
Learn more about the Ingate Firewall
Learn more about the Ingate SIParator
For additional information on Ingate SIP trunking solution please contact info@ingate.com
Ingate SIParators
http://www.ingate.com/SIP-trunking.php
he most common solution for enterprises with a local IP-PBX to connect to the PSTN is via a local PSTN gateway. However, today more and more service providers offer one single connection for both data and voice between the carrier and the enterprise. This is commonly called a SIP trunk. For the enterprise this means that they no longer need either the local PSTN gateway or costly PRI/BRI?s as the local IP-PBX can be connected to the service provider?s PSTN gateways over the Internet.
The SIP Trunking software module, working in conjunction with an Ingate Firewall or SIParator, solves the Network Address Translation (NAT) traversal issues that are faced by businesses using a SIP trunk. Together, they control both incoming and outgoing communications and route the communication to the intended users. All voice traffic (as well as data traffic) must traverse the enterprise firewall/NAT. However, SIP traffic cannot traverse traditional enterprise firewalls and NAT devices. As a result, the firewall/NAT device blocks all SIP traffic, which includes VoIP. Ingate resolves this issue, enabling enterprises to utilize SIP trunks and enjoy the benefits of SIP trunking while maintaining the security and integrity of their network.
A cost-efficient solution, the SIP trunk reduces monthly expenses for the enterprise as they:
* Only need one connection for both data and voice
* No longer need PRI/BRI connections
* Don?t have to buy or maintain a local PSTN-gateway
Firewalls and Benefits of Proxy-Based Solutions -- Technical details
The Ingate Firewall® or Ingate SIParator® solves the basic problem of firewall and NAT traversal using a SIP proxy-based implementation. The SIP proxy is a complete solution to the firewall and NAT traversal issues introduced by the enterprise firewall. A proxy is designed to briefly stop the signaling packets so that each one can be inspected before the header information is rewritten. The SIP proxy also makes sure the packets are delivered to the appropriate endpoints. This provides the enterprise with a flexible, controlled implementation of SIP-based communications that also maintains voice/video quality. Ingate Firewalls and SIParators offer a number of advantages:
* Near-end NAT traversal for connecting SIP communications between an enterprise and a carrier
* Dynamically open and close the media ports to admit voice or video on both UDP and TCP ports
* Encryption for communication privacy and prevention of eavesdropping. Include termination, transcoding and passthrough of TLS and SRTP
* Authentication and registration at the carrier side
* Give priority of voice traffic using the Ingate Quality of Service features
* ENUM look-up to route the call IP-IP all the way if possible
* Least cost routing of international calls
Confirmed interoperability
Ingate has confirmed interoperability several of the leading IP-PBX vendors and ITSPs. See the full list here.
Startup Tool for SIP Trunking
The Startup Tool is an installation tool for Ingate Firewall® and Ingate SIParator® products using the Ingate SIP Trunking software module, which facilitates the setup of complete SIP trunking solutions. The tool will automatically configure a user?s Ingate Firewall or SIParator to work with the IP-PBX or SIP trunking service provider of their choice. With the push of a button, the configuration tool will automatically create a SIP trunk connection designed to the user?s individual setup.
Read more about the tool here.
Read more about the Ingate SIP Trunking software module
Learn more about the Ingate Firewall
Learn more about the Ingate SIParator
For additional information on Ingate SIP trunking solution please contact info@ingate.com
viernes, 23 de noviembre de 2007
DISA - Direct Inward System Access
DISA ()
Direct Inward System Access leaves out the people who call into the system and provides them with an internal dial tone.
DISA (password [context [callerid [mailbox [@-voice context ]]]])
DISA (file with a password, [callerid [mailbox [@-voice context]]]) provides a dial tone internal callers outside so that they can make calls as if calling from inside extension . Upon hearing the dial tone, an access code must be entered followed by the "#". If it is correct, the caller hears another tone, which is the system of dial tone and the caller can make and initiate calls.
[Caution] This type of access represents a serious threat to security and real and must be carefully considered and planned before use, but you should be used at all!
The option is a numerical code that access should be introduced to the caller to make calls. Following this syntax, all users on the floor using the same access code. If you want to allow access unsecured, enter the string "no password," instead of a real password.
The context option specifies the context in which it began the call is placed. If not provided, DISA () assumes that the context called disabilities.
The callerid option determines the number of mail (and the optional voice context) of a mailbox. If the mailbox containing new messages to the caller will hear a stuttered dial tone to indicate this.
Alternatively, you can use the password file to define multiple access passwords. Each line of this file can contain either an access code or a combination of an access code and a context, separated by the "|" character (pipe). If not specified the context, it is assumed disability.
If the caller is authenticated successfully with a valid access code, DISA () will start the call in the context specified.
Direct Inward System Access leaves out the people who call into the system and provides them with an internal dial tone.
DISA (password [context [callerid [mailbox [@-voice context ]]]])
DISA (file with a password, [callerid [mailbox [@-voice context]]]) provides a dial tone internal callers outside so that they can make calls as if calling from inside extension . Upon hearing the dial tone, an access code must be entered followed by the "#". If it is correct, the caller hears another tone, which is the system of dial tone and the caller can make and initiate calls.
[Caution] This type of access represents a serious threat to security and real and must be carefully considered and planned before use, but you should be used at all!
The option is a numerical code that access should be introduced to the caller to make calls. Following this syntax, all users on the floor using the same access code. If you want to allow access unsecured, enter the string "no password," instead of a real password.
The context option specifies the context in which it began the call is placed. If not provided, DISA () assumes that the context called disabilities.
The callerid option determines the number of mail (and the optional voice context) of a mailbox. If the mailbox containing new messages to the caller will hear a stuttered dial tone to indicate this.
Alternatively, you can use the password file to define multiple access passwords. Each line of this file can contain either an access code or a combination of an access code and a context, separated by the "|" character (pipe). If not specified the context, it is assumed disability.
If the caller is authenticated successfully with a valid access code, DISA () will start the call in the context specified.
Suscribirse a:
Entradas (Atom)

 Entradas